Access RoomOS xAPI via HTTP (section rxp-3)
Abstract
In this section, we'll dive into the various pieces of the RoomOS Device xAPI stack and how to make use of them in various ways over the Hypertext Transfer Protocol (HTTP) using local authentication on a Cisco RoomOS Device.
Here, we'll see the relationships between HTTP and SSH on how to structure an xConfiguration, xCommand, xStatus and xEvents to a Cisco RoomOS device
Section rxp-3 Requirements
Note
This lab assumes you have access to a Cisco RoomOS Device that is already setup and ready for use. If your device is not registered and online, please do so before beginning
Hardware
- A Laptop
- A Cisco Desk, Board or Room Series Device running the most recent On Premise or Cloud Stable software
- A Touch Controller is required when working on a Room Series Device. Either Room navigator or 3rd part touch display
- Preferred Device: Cisco Desk Pro
- A minimum of 1 camera (Either Integrated or External)
Software
-
Laptop
- Recommended Browser: Chrome or Firefox
- Postman
- Section rxp-3 Postman Collection
- Webhook.site
-
RoomOS Device
- Either the current On Premise or Cloud Stable release
Section rxp-3 Setup
-
If joining from a Lab at WebexOne, Postman should be installed on your loaner laptop already, if not, please install the application now using the link below
-
In addition to the Postman application, please download the Postman Collection listed below
-
We'll also be leveraging a Webhook testing site, click the link below to open this is site in a new tab
HTTP Authentication and Format (rxp-3.1)
URL Structure (rxp-3.1.1)
The request URL for your Codec will change depending on whether you're making a Get or Post Call
Click the tabs below to see an example of each URL structure
https://[YOUR_DEVICE_IP]/
https://[YOUR_DEVICE_IP]/
Authentication Format (rxp-3.1.2)
When using HTTP to talk to a Cisco RoomOS Device locally, the device uses basic authentication to accept those requests. This authentication is formatted in base64 with it's username and password concatenated as a single string separated by a colon
Click on the tabs below to see how a Username and Password transitions to an encoded base64 string
Username:
Password:
"Authorization": "Basic
Request Headers (rxp-3.1.3)
HTTP Requests have a myriad of headers that could be used, and this is usually defined by the device or service you're communicating with. For Cisco RoomOS devices using local authentication your requests will use the following headers
Your Get and Post requests will use this Authorization in one of its 2 headers
| Key | Value |
|---|---|
Content-Type |
text/xml |
Authorization |
Basic [YOUR_BASE64_ENCODED_AUTH] |
URL Parameter Format (rxp-3.1.4)
When retrieving xStatus or xConfiguration information, you'll perform an HTTP Get request. Get requests using HTTP and local authentication will target this base url
https://[YOUR_DEVICE_IP] /getxmlThe xAPI path you want to target is then defined as a URL parameter
This xAPI path is separated by a
Click here to see the difference between a shell path and a Local HTTP Get Path
x Path Bookings Current Id https://[YOUR_DEVICE_IP] /getxml?location=Status / Bookings / Current / Id xAPI: xConfiguration SystemUnit Name
URL: https://
xAPI: xStatus Logging ExtendedLogging Mode
URL: https://
Body Format (rxp-3.1.5)
When issuing a change to an xConfig or issuing an xCommand, you'll perform an HTTP POST request. POST requests using HTTP and local authentication will target this base url
https://[YOUR_DEVICE_IP] /putxmlThe xAPI path you want to target is then defined in the body of the request
The body is structured as XML and is formatted as a string. The entire xAPI path, parameters and any values are defined within this XML string.
URL: https://[YOUR_DEVICE_IP]/putxml
Click the tabs below to see an example xConfiguration and xCommand body structured as XML
- <
xConfiguration></xConfiguration> - <
xCommand></xConfiguration> - <
xStatus></xConfiguration>
<Parent>
  <Child>
    <ChildParameter>Value<ChildParameter>
  </Child>
<Parent>
- <
xConfiguration></xConfiguration> - <
xCommand></xConfiguration> - <
xStatus></xConfiguration>
<Parent>
  <Child>
    <ChildParameter>Value<ChildParameter>
  </Child>
<Parent>
Take advantage of your Code Language
Many languages have built in function to help process data
For instance, when working in ES6 or newer Javascript Environments, you can leverage the btoa() and atob() functions that are built into that language to quickly encode and decode strings to/from base64. Ex: btoa('admin:admin1234') = YWRtaW46YWRtaW4xMjM0==
Full HTTP Get and Post examples (rxp-3.1.5)
Click to view a Full Example of each written using the JavaScript Fetch API (rxp-3.1.5.a)
const myHeaders = new Headers();
myHeaders.append("Content-Type", "text/xml");
myHeaders.append("Authorization", "Basic [YOUR_BASE64_ENCODED_AUTH]");

const requestOptions = {
  method: "GET",
  headers: myHeaders,
  redirect: "follow"
};

fetch("https://[YOUR_DEVICE_IP]/getxml?location=Configuration/SystemUnit/Name", requestOptions)
  .then((response) => response.text())
  .then((result) => console.log(result))
  .catch((error) => console.error(error));

/* Below is the Response Body after making a Successful Request

<?xml version="1.0"?>
<Configuration product="Cisco Codec" version="ce11.20.1.7.913a6c7c769" apiVersion="4">
    <SystemUnit>
        <Name valueSpaceRef="/Valuespace/STR_0_50_NoFilt"> My Room Bar Pro</Name>
    </SystemUnit>
</Configuration>
*/
const myHeaders = new Headers();
myHeaders.append("Content-Type", "text/xml");
myHeaders.append("Authorization", "Basic [YOUR_BASE64_ENCODED_AUTH]");

const raw = "<Configuration><SystemUnit><Name>My New System Name</Name></SystemUnit></Configuration>";

const requestOptions = {
  method: "POST",
  headers: myHeaders,
  body: raw,
  redirect: "follow"
};

fetch("https://[YOUR_DEVICE_IP]/putxml", requestOptions)
  .then((response) => response.text())
  .then((result) => console.log(result))
  .catch((error) => console.error(error));

/* Below is the Response Body after making a Successful Request

<?xml version="1.0"?>
<Configuration>
    <Success/>
</Configuration>
*/
Click to view a Full Example of each written using the Macro Editor [ES6 JS] and your codec's HTTPClient xAPIs (rxp-3.1.5.b)
import xapi from 'xapi';

const destinationIp = '[YOUR_DEVICE_IP]';
const headers = ['Content-Type: text/xml', `Authorization: Basic ${btoa('[YOUR_AUTH]')}`];


async function getPath(path){
  const destinationUrl = `https://${destinationIp}/getxml?location=${path}`;

  try {
    const request = await xapi.Command.HttpClient.Get({
      Url: destinationUrl,
      Header: headers,
      AllowInsecureHTTPS: 'True'
    })
    console.debug(request);
    return request
  } catch (e) {
    let err = {
      Context: `Failed Get Request to [${destinationUrl}]`,
      ...e
    }
    throw new Error(e)
  }
}

getPath('Configuration/SystemUnit/Name');
import xapi from 'xapi';

const destinationIp = '[YOUR_DEVICE_IP]';
const headers = ['Content-Type: text/xml', `Authorization: Basic ${btoa('[YOUR_AUTH]')}`];


async function setPath(body){
  const destinationUrl = `https://${destinationIp}/putxml`;

  try {
    const request = await xapi.Command.HttpClient.Post({
      Url: destinationUrl,
      Header: headers,
      AllowInsecureHTTPS: 'True'
    }, body)
    console.debug(request);
    return request
  } catch (e) {
    let err = {
      Context: `Failed Post Request to [${destinationUrl}]`,
      ...e
    }
    throw new Error(e)
  }
}

setPath('<Configuration><SystemUnit><Name>My New System Name</Name></SystemUnit></Configuration>');
Learn more about Device HTTPClient xAPIs
 Hey, what's up with that
 ...e in your caught error?
Again, knowing you language has it's benefits
... is called a Spread Operator and it's very useful when playing with data in ES6 JS
We're using it here to pass the original error the xAPI produced into an err object as well as some context to help us troubleshoot our macro in the future.
Click to view a Full Example of each written using the Python Requests API (rxp-3.1.5.c)
import requests

url = "https://[YOUR_DEVICE_IP]/getxml?location=Configuration/SystemUnit/Name"

payload = ""
headers = {
  'Content-Type': 'text/xml',
  'Authorization': 'Basic [YOUR_BASE64_ENCODED_AUTH]'
}

response = requests.request("GET", url, headers=headers, data=payload)

print(response.text)

# Below is the Response Body after making a Successful Request

# <?xml version="1.0"?>
# <Configuration>
#     <Success/>
# </Configuration>
import requests

url = "https://[YOUR_DEVICE_IP]/putxml"

payload = "<Configuration><SystemUnit><Name>My New System Name</Name></SystemUnit></Configuration>"
headers = {
  'Content-Type': 'text/xml',
  'Authorization': 'Basic [YOUR_BASE64_ENCODED_AUTH]'
}

response = requests.request("POST", url, headers=headers, data=payload)

print(response.text)

# Below is the Response Body after making a Successful Request

# <?xml version="1.0"?>
# <Configuration product="Cisco Codec" version="ce11.20.1.7.913a6c7c769" apiVersion="4">
#     <SystemUnit>
#         <Name valueSpaceRef="/Valuespace/STR_0_50_NoFilt"> My Room Bar Pro</Name>
#     </SystemUnit>
# </Configuration>
Import and Configure the section rxp-3.1 Postman Collection (rxp-3.2)
Whereas we'll be using Postman, this tool will automatically take our basic auth and structure as an with Header for us and convert that string into base64
This collection has most pieces structured as we'd need it to and will be used through sections rxp-3.3 through rxp-3.5
Import Collection
- With Postman open, in a new or existing workspace select import
- Select File
- Locate the WX1-Lab:1451-HTTP-Postman-Collection.Postman_collection.json and Open it
- You should now have the Postman Collection installed for this lab
View Import Postman Collection

Configure Postman Collection for sections rxp-3.3 through rxp-3.5
- Click on the WX1-Lab:1451-HTTP-Postman-Collection root folder
- Select Variables
- Add the following information for your codec in both the
Initial ValueandCurrent Valuefields- device_username
- device_password
- device_ipAddress
- Select Save (or one of the keyboard shortcuts for your computer)
- Ctrl+S for Windows
- Cmd+S for Mac
View Configure Postman Collection for sections rxp-3.3 through rxp-3.5

Executing xCommands (rxp-3.3)
Abstract
Throughout section rxp-3.3, you'll learn how to format and execute xCommands via HTTP using Postman.
The techniques outlined here will correspond to the methods needed for setting new xConfiguration Values in section rxp-3.4
Lesson: Execute an xCommand (rxp-3.3.1)
XML Body Location

-
xAPI: xCommand Video Selfview Set
-
Task: Structure the xAPI command above into an XML format then place this into the Body of the Execute an xCommand request in your Postman collection. Include the following Parameters and Values
- Mode: On
- FullScreenMode: On
- OnMonitorRole: First
Once the Postman Request has been updated, Save the request, select Send and review the Postman Terminal's response and observe any changes to your device
View properly formatted XML and Successful Response

<Command>
  <Video>
    <Selfview>
      <Set>
        <Mode>On</Mode>
        <FullScreenMode>On</FullScreenMode>
        <OnMonitorRole>First</OnMonitorRole>
      </Set>
    </Selfview>
  </Video>
</Command>
View Failed Response
If you have a failed response, review the errors as it will point out how to resolve your particular issue in your XML payload and try again

Lesson: Execute multiple xCommands in a single request (rxp-3.3.2)
Info
You can structure your XML to allow for multiple xAPI calls under a single Parent Path, in this case the Parent Path is xCommand
So long as the paths you're running are under their appropriate Common Path Nodes, then they will be considered. Should those Common Path Nodes deviate, then you must structure the XML to match
-
xAPI(s):
- xCommand Video Selfview Set
- xCommand UserInterface WebView Display
- xCommand UserInterface Message Rating Display
-
Task:
xCommand Video Selfview SetandxCommand UserInterface WebView Displayhave already be set in your collection under their appropriate Common Node Path. We've highlighted the Common Node Paths above for you to see. Structure the XML for xCommand UserInterface Message Rating Display and place it as the next xCommand in the XML structure given to you. Include the following Parameters and Values- Title: Rate this Site
- Text: From 0 to 5 stars, rate this Website
- Duration: 45
Once the Postman Request has been updated, Save the request, select Send and review the Postman Terminal's response and observe any changes to your device
View Successful OSD Output

View properly formatted XML and Successful Response

<Command>
  <UserInterface>
    <Message>
      <Rating>
        <Display>
          <Title>Rate this Site</Title>
          <Text>From 0 to 5 stars, rate this Website</Text>
          <Duration>45</Duration>
        </Display>
      </Rating>
    </Message>
  </UserInterface>
</Command>
<Command>
  <Video>
    <Selfview>
      <Set>
        <Mode>Off</Mode>
      </Set>
    </Selfview>
  </Video>
  <UserInterface>
    <WebView>
      <Display>
        <Mode>Modal</Mode>
        <Url>https://roomos.cisco.com</Url>
      </Display>
    </WebView>
    <!-- Message Rating Display Should Start Here -->
    <Message>
      <Rating>
        <Display>
          <Title>Rate this Site</Title>
          <Text>From 0 to 5 stars, rate this Website</Text>
          <Duration>45</Duration>
        </Display>
      </Rating>
    </Message>
    <!-- Message Rating Display Should End Here -->
  </UserInterface>
</Command>
View Failed Response
If you have a failed response, review the errors as it will point out how to resolve your particular issue in your XML payload and try again
Lesson: Execute an xCommand with multiple arguments with the same name (rxp-3.3.3)
Info
We can structure the XML payload for HTTP to include multiple parameters under the same name
Simply duplicate the Parameter that's capable of being duplicated and add that into your XML body. Be sure to include the Opening and Closing XML tags for that parameter as well
-
xAPI(s):
- xCommand UserInterface WebView Clear
- xCommand UserInterface Message Rating Clear
- xCommand Video Selfview Set
- xCommand Video Input SetMainVideoSource
-
Task: We'll be running multiple commands in conjunction to having multiple parameters in this lesson.
- To clean up from the previous lesson, we'll send an xCommand to clear by replacing the Display Tags for both with Clear and deleting any parameters they had
xCommand UserInterface WebViewDisplayClearxCommand UserInterface Message RatingDisplayClear
- Then we'll set selfview back on in Full Screen
- The above tasks will come preloaded in the Postman collection, your task is to structure the XML for xCommand Video Input SetMainVideoSource and place it as the next xCommand in the XML structure given to you and duplicate the
ConnectorIdparameter. Include the following Parameters and Values- ConnectorId: 1
- Layout: Prominent
- To clean up from the previous lesson, we'll send an xCommand to clear by replacing the Display Tags for both with Clear and deleting any parameters they had
Once the Postman Request has been updated, Save the request, select Send and review the Postman Terminal's response and observe any changes to your device
View Successful OSD Output

View properly formatted XML and Successful Response

<Command>
  <Video>
    <Input>
      <SetMainVideoSource>
        <ConnectorId>1</ConnectorId>
        <!-- Your Duplicate ConnectorId Parameter Should Start Here  -->
        <ConnectorId>1</ConnectorId>
        <!-- Your Duplicate ConnectorId Parameter Should End Here  -->
        <Layout>Prominent</Layout>
      </SetMainVideoSource>
    </Input>
  </Video>
</Command>
<Command>
  <UserInterface>
    <WebView>
      <Clear></Clear>
    </WebView>
    <Message>
      <Rating>
        <Clear></Clear>
      </Rating>
    </Message>
  </UserInterface>
  <Video>
    <Selfview>
      <Set>
        <Mode>On</Mode>
        <FullScreenMode>On</FullScreenMode>
        <OnMonitorRole>First</OnMonitorRole>
      </Set>
    </Selfview>
    <Input>
      <SetMainVideoSource>
        <ConnectorId>1</ConnectorId>
        <!-- Your Duplicate ConnectorId Parameter Should Start Here  -->
        <ConnectorId>1</ConnectorId>
        <!-- Your Duplicate ConnectorId Parameter Should End Here  -->
        <Layout>Prominent</Layout>
      </SetMainVideoSource>
    </Input>
  </Video>
</Command>
View Failed Response
If you have a failed response, review the errors as it will point out how to resolve your particular issue in your XML payload and try again
Lesson: Execute an xCommand with a multiline argument (rxp-3.3.4)
Info
Multiline Arguments can be placed into the body of the XML as well. This specifically uses a <body> which isn't explicitly highlighted in the path of the API.
The structure of a Multiline argument should look similar to the following
<Parent>
  <Child>
    <ChildParameter>Value<ChildParameter>
    <body>[MY_MULTILINE_ARGUMENT]</body>
  </Child>
<Parent>
-
xAPI(s):
- xCommand Video Selfview Set
- xCommand Video Input SetMainVideoSource
- xCommand UserInterface Extensions Panel Save
-
Task: We'll be running multiple commands in conjunction to having a multiline argument.
- We'll start by correcting our Camera View from the previous lesson, which will come pre-loaded in the Postman Collection
- Your task is to structure the XML for xCommand UserInterface Extensions Panel Save and place it as the next xCommand in the XML structure given. Include the following Parameters and Values
- PanelId: wx1_lab_multilineCommand
- body:
Your <body> Value
<Extensions>
  <Panel>
    <Order>1</Order>
    <PanelId>wx1_lab_multilineCommand</PanelId>
    <Location>HomeScreen</Location>
    <Icon>Info</Icon>
    <Color>#FF70CF</Color>
    <Name>MultiLine Command [Section rxp-3.3]</Name>
    <ActivityType>Custom</ActivityType>
  </Panel>
</Extensions>
Once the Postman Request has been updated, Save the request, select Send and review the Postman Terminal's response and observe any changes to your device
You're Wrapping XML around XML!
Note: Not all multiline arguments are in XML format; for example, xCommand UserInterface Extensions Panel Save is. It’s important to remember that any data placed within a <body> tag should always be written as a String. If your integration automatically injects this information, additional processing may be necessary.
The xAPI will have a hard time deciphering your Body's XML value vs the xAPI XML Payload
You'll want to "Stringify" the XML body by replacing all instances of < characters with < and all instances of > characters with > >
- These aren't the only characters that are impacted, and that will largely depend on your XML body value
Luckily, you can use the Stringify XML Body on the Tools Page to do this for you
View Successful OSD Output

View properly formatted XML and Successful Response

<Command>
<UserInterface>
<Extensions>
<Panel>
<Save>
<PanelId>wx1_lab_multilineCommand</PanelId>
<body><Extensions> <Panel> <Order>1</Order> <PanelId>wx1_lab_multilineCommand</PanelId> <Location>HomeScreen</Location> <Icon>Info</Icon> <Color>#FF70CF</Color> <Name>MultiLine Command [Section rxp-3.3]</Name> <ActivityType>Custom</ActivityType> </Panel> </Extensions>
</body>
</Save>
</Panel>
</Extensions>
</UserInterface>
</Command>
<Command>
<Video>
<Selfview>
<Set>
<Mode>Off</Mode>
</Set>
</Selfview>
<Input>
<SetMainVideoSource>
<ConnectorId>1</ConnectorId>
<Layout>Equal</Layout>
</SetMainVideoSource>
</Input>
</Video>
<!-- Your UserInterface Extensions Panel Save XML Should Start Here -->
<UserInterface>
<Extensions>
<Panel>
<Save>
<PanelId>wx1_lab_multilineCommand</PanelId>
<body><Extensions> <Panel> <Order>1</Order> <PanelId>wx1_lab_multilineCommand</PanelId> <Location>HomeScreen</Location> <Icon>Info</Icon> <Color>#FF70CF</Color> <Name>MultiLine Command [Section rxp-3.3]</Name> <ActivityType>Custom</ActivityType> </Panel> </Extensions>
</body>
</Save>
</Panel>
</Extensions>
</UserInterface>
<!-- Your UserInterface Extensions Panel Save XML Should Start Here -->
</Command>
View Failed Response
If you have a failed response, review the errors as it will point out how to resolve your particular issue in your XML payload and try again
Lesson: Execute an xCommand which generates data and responds (rxp-3.3.5)
Info
Some commands will generate data and output a response of that data. All commands will respond with an "OK" or "Error" but other can provide data.
Whereas we just made a UI extension with the API, we can now pull a list of our custom extensions using the API
-
xAPI: xCommand UserInterface Extensions List
-
Task: Structure the xAPI command above into an XML format then place this into the Body of the Execute an xCommand which generates data and responds request in your Postman collection. Include the following Parameters and Values
- ActivityType: Custom
Once the Postman Request has been updated, Save the request, select Send and review the Postman Terminal's response and observe any changes to your device
View properly formatted XML and Successful Response

<Command>
  <UserInterface>
    <Extensions>
      <List>
        <ActivityType>Custom</ActivityType>
      </List>
    </Extensions>
  </UserInterface>
</Command>
View Failed Response
If you have a failed response, review the errors as it will point out how to resolve your particular issue in your XML payload and try again
Setting and Getting xConfigurations (rxp-3.4)
Abstract
Throughout section rxp-3.4, you'll continue to learn how to format XML payloads as you work to set new xConfigurations against the codec
Unlike xCommands, you can then pull back the value of xConfigurations using a Get Request.
The techniques outlined here will correspond to the methods needed for Getting xStatus Values in section rxp-3.5
Lesson: Set a new xConfiguration Value (rxp-3.4.1)
-
xAPI: xConfiguration Audio DefaultVolume
-
Task: Structure the xAPI command above into an XML format then place this into the Body of the Set a new xConfiguration Value request in your Postman collection. Set DefaultVolume to
75
View properly formatted XML and Successful Response

<Configuration>
  <Audio>
    <DefaultVolume>75</DefaultVolume>
  </Audio>
</Configuration>
View Failed Response
If you have a failed response, review the errors as it will point out how to resolve your particular issue in your XML payload and try again
Lesson: Set multiple xConfiguration Values in a single Request (rxp-3.4.2)
-
xAPI(s):
- xConfiguration Audio DefaultVolume
- xConfiguration SystemUnit Name
-
Task:
- We'll set the DefaultVolume back to 50, which will be preloaded into the Postman collection
- Your task is to structure the XML for xConfiguration SystemUnit Name and place it as the next xCommand in the XML structure given. Set the Name to
Codec_Xwhere X is the # of your workstation pod or your name
View properly formatted XML and Successful Response

<Configuration>
  <SystemUnit>
    <Name>Pod_X</Name>
  </SystemUnit>
</Configuration>
<Configuration>
  <Audio>
    <DefaultVolume>50</DefaultVolume>
  </Audio>
  <!-- SystemUnit Name Should Start Here -->
  <SystemUnit>
    <Name>Pod_X</Name>
  </SystemUnit>
  <!-- SystemUnit Name Should End Here -->
</Configuration>
View Failed Response
If you have a failed response, review the errors as it will point out how to resolve your particular issue in your XML payload and try again
Lesson: Getting an xConfiguration Value (rxp-3.4.3)
Info
Up until this point, you've been making Post requests with an xAPI path provided as a part of the Post body written in XML format
Whereas, we're pivoting to a Get rest, the format of the request changes. We no longer need a body, but we need to define the xAPI path as apart of the URL under it's location tag
Refer to section rxp-3.2 for a refresher on this syntax
-
xAPI: xConfiguration Audio DefaultVolume
-
Structure the xAPI command above into the URL under the Getting an xConfiguration Value request in your Postman collection. This path should rest behind the ?location and separated by a
/
View properly formatted URL and Successful Response

https://{{ device_ipAddress }}/getxml?location=Configuration/Audio/DefaultVolume
View Failed Response
Something to note on xConfig Get Requests, is you'll still get a 200 OK if your auth and IP are correct when talking to the Codec
But a lack of response information can tell you that you may have a fault in your xAPI path in the URL


Lesson: Get multiple xConfiguration Values under a Common Node (rxp-3.4.4)
Info
You can pull more information if you move up to a Common Node
By dropping DefaultVolume from xConfiguration Audio DefaultVolume we can grab all the Configuration Setting under the Audio Branch from the codec
-
xAPI: xConfiguration Audio
-
Structure the xAPI command above into the URL under the Getting multiple xConfiguration Values under a Common Node request in your Postman collection.
View properly formatted URL and Successful Response
https://{{ device_ipAddress }}/getxml?location=Configuration/Audio
View Successful HTTP Response
<?xml version="1.0"?>
<Configuration product="Cisco Codec" version="ce11.20.1.7.913a6c7c769" apiVersion="4">
  <Audio>
    <DefaultVolume valueSpaceRef="/Valuespace/INT_0_100">75</DefaultVolume>
    <Ethernet>
      <Encryption valueSpaceRef="/Valuespace/TTPAR_RequiredOptional">Required</Encryption>
      <SAPDiscovery>
        <Address valueSpaceRef="/Valuespace/STR_0_64_IPv4AdminMcast">239.255.255.255</Address>
        <Mode valueSpaceRef="/Valuespace/TTPAR_OnOff">Off</Mode>
      </SAPDiscovery>
    </Ethernet>
    <!-- And the List Goes On... -->
  </Audio>
</Configuration>
View Failed Response
Something to note on xConfig Get Requests, is you'll still get a 200 OK if your auth and IP are correct when talking to the Codec
But a lack of response information can tell you that you may have a fault in your xAPI path in the URL
What about Subscribing to an xConfiguration?
Subscriptions via HTTP are possible, but require a process outside of using HTTP Post/Get commands. We'll need to leverage the HTTPFeedback feature of the codec and a tool that can receive a WebHook
So we'll save HTTPFeedback for the end of section rxp-3 and handle all HTTP based subscriptions there
Getting xStatuses (rxp-3.5)
Lesson: Getting an xStatus Value (rxp-3.5.1)
-
xAPI: xStatus Audio Volume
-
Structure the xAPI command above into the URL under the Getting an xStatus request in your Postman collection.
View properly formatted URL and Successful Response

https://{{ device_ipAddress }}/getxml?location=Status/Audio/Volume
View Failed Response
Something to note on xStatus Get Requests, is you'll still get a 200 OK if your auth and IP are correct when talking to the Codec
But a lack of response information can tell you that you may have a fault in your xAPI path in the URL
Lesson: Get multiple xStatus Values under a Common Node (rxp-3.5.2)
-
xAPI: xStatus Audio
-
Structure the xAPI command above into the URL under the Getting multiple xStatus Values under a Common Node request in your Postman collection.
View properly formatted URL and Successful Response
https://{{ device_ipAddress }}/getxml?location=Status/Audio
View Successful HTTP Response
<?xml version="1.0"?>
<Status product="Cisco Codec" version="ce11.20.1.7.913a6c7c769" apiVersion="4">
  <Audio>
    <Devices>
      <Bluetooth>
        <ActiveProfile>None</ActiveProfile>
      </Bluetooth>
      <HandsetUSB>
        <ConnectionStatus>NotConnected</ConnectionStatus>
        <Cradle>OnHook</Cradle>
      </HandsetUSB>
      <HeadsetUSB>
        <ConnectionStatus>NotConnected</ConnectionStatus>
        <Description></Description>
        <Manufacturer></Manufacturer>
      <!-- And the List Goes On... -->
  </Audio>
</Status>
View Failed Response
Something to note on xStatus Get Requests, is you'll still get a 200 OK if your auth and IP are correct when talking to the Codec
But a lack of response information can tell you that you may have a fault in your xAPI path in the URL
Using WebHooks to subscribe to xConfigurations, xStatuses and xEvents (rxp-3.6)
Important
Your codec has a limit of 4 HTTPFeedback Slots with up to 15 xAPI paths expressions in the same command
xCommand References for Section: rxp-3.6
-
xCommand HttpFeedback Register
Register the device to an HTTP(S) server to return XML feedback over HTTP(S) to specific URLs.
Parameters:
ServerUrl [Required] FeedbackSlot [Required] Expression Format -
xCommand HttpFeedback Deregister
Deregister the HTTP feedback over HTTP(S).
Parameters:
FeedbackSlot [Required] -
xCommand HttpFeedback Enable
Re-enables a previously registered feedback slot after it has failed and become deactivated.
Parameters:
FeedbackSlot [Required]
Locate and Configure your Unique URL from Webhook.Site
- Go to https://webhook.site
- Copy your Unique URL
- Open Postman
- Click on the WX1-Lab:1451-HTTP-Postman-Collection root folder
- Select Variables
- Pase your unique URL into
Initial ValueandCurrent Valuefields for WebhookSite_Unique_Url - Select Save (or one of the keyboard shortcuts for your computer)
- Ctrl+S for Windows
- Cmd+S for Mac

Info
For all Webhook Examples below, we'll need to register HTTPFeedback slot by first running
xCommand HTTPFeedback Register
These have been preformatted for you in the Postman collection
View Example WebHook.site output

Lesson: Subscribe to the full xConfiguration Branch (rxp-3.6.1)
- Task:
- In your Postman Collection under HTTP > Section: (rxp-3.6)
- Select the Subscribe to the full xConfiguration Branch request
- View how the body is Structured in the XML body
- Select Send
- Press the
Subscription Assistant Buttonon your Touch Interface- Under the xConfigurations Page, press any of the buttons on this page
- Observe your Webhook.Site Terminal output, those responses you saw in the previous lesson should have stopped outputting in your Webhook.Site Terminal
- Optional: Press those buttons and switches a few times to see more changes come in
Lesson: Subscribe to the full xStatus Branch (rxp-3.6.2)
- Task:
- In your Postman Collection under HTTP > Section: rxp-3.6
- Select the Subscribe to the full xStatus Branch request
- View how the body is Structured in the XML body
- Then select Send and Monitor the output on the Webhook.Site terminal
- Your device will forward an event in the status branch soon
- Press the
Subscription Assistant Buttonon your Touch Interface- Under the xStatuses Page, press any of the buttons on this page
- Observe your Webhook.Site Terminal output, those responses you saw in the previous lesson should have stopped outputting in your Webhook.Site Terminal
Lesson: Subscribe to the full xEvent Branch (rxp-3.6.3)
- Task:
- In your Postman Collection under HTTP > Section: (rxp-3.6)
- Select the Subscribe to the full xEvent Branch request
- View how the body is Structured in the XML body
- Then select Send and Monitor the output on the Webhook.Site terminal
- Your device will forward an event in the event branch soon
- Press the
Subscription Assistant Buttonon your Touch Interface- Under the xEvents Page, press any of the buttons on this page
- Observe your Webhook.Site Terminal output, those responses you saw in the previous lesson should have stopped outputting in your Webhook.Site Terminal
Lesson: Subscribe to Specific Expressions on any Branch (rxp-3.6.4)
- Task:
- In your Postman Collection under HTTP > Section: (rxp-3.6)
- Select the Subscribe to Specific Expressions on any Branch request
- View how the body is Structured in the XML body
- Take Note, we've changed our Expression Parameter
- Rather than subscribing to All States, we instead narrow down what we're interested in
- For each expression we want to listen too, we will declare a new Expression Parameter
- We can have up to 15 Expressions defined in a single feedback slot
- Then select Send and Monitor the output on the Webhook.Site terminal
- You will need to interact with the system Volume and press the MultiLine Command [Section rxp-3.3] Panel to see events pour into the WebHook.site terminal
- Press the
Subscription Assistant Buttonon your Touch Interface- Clicking on the
Subscription Assistant Buttonwill fire a Panel Event - Under the xStatuses, move the Adjust Volume slider to generate events
- Other buttons under xStatus won't take any effect
- Under the xEvents Page, press any of the buttons on this page
- Observe your Webhook.Site Terminal output, those responses you saw in the previous lesson should have stopped outputting in your Webhook.Site Terminal
- Clicking on the
Section rxp-3 Cleanup (rxp-3).7
Important
- Press the
Subscription Assistant Button on your Touch Interface - Under the
Section Cleanup Page, select theRun Section Cleanup? button - Select
Yes, Run the Cleanup Script
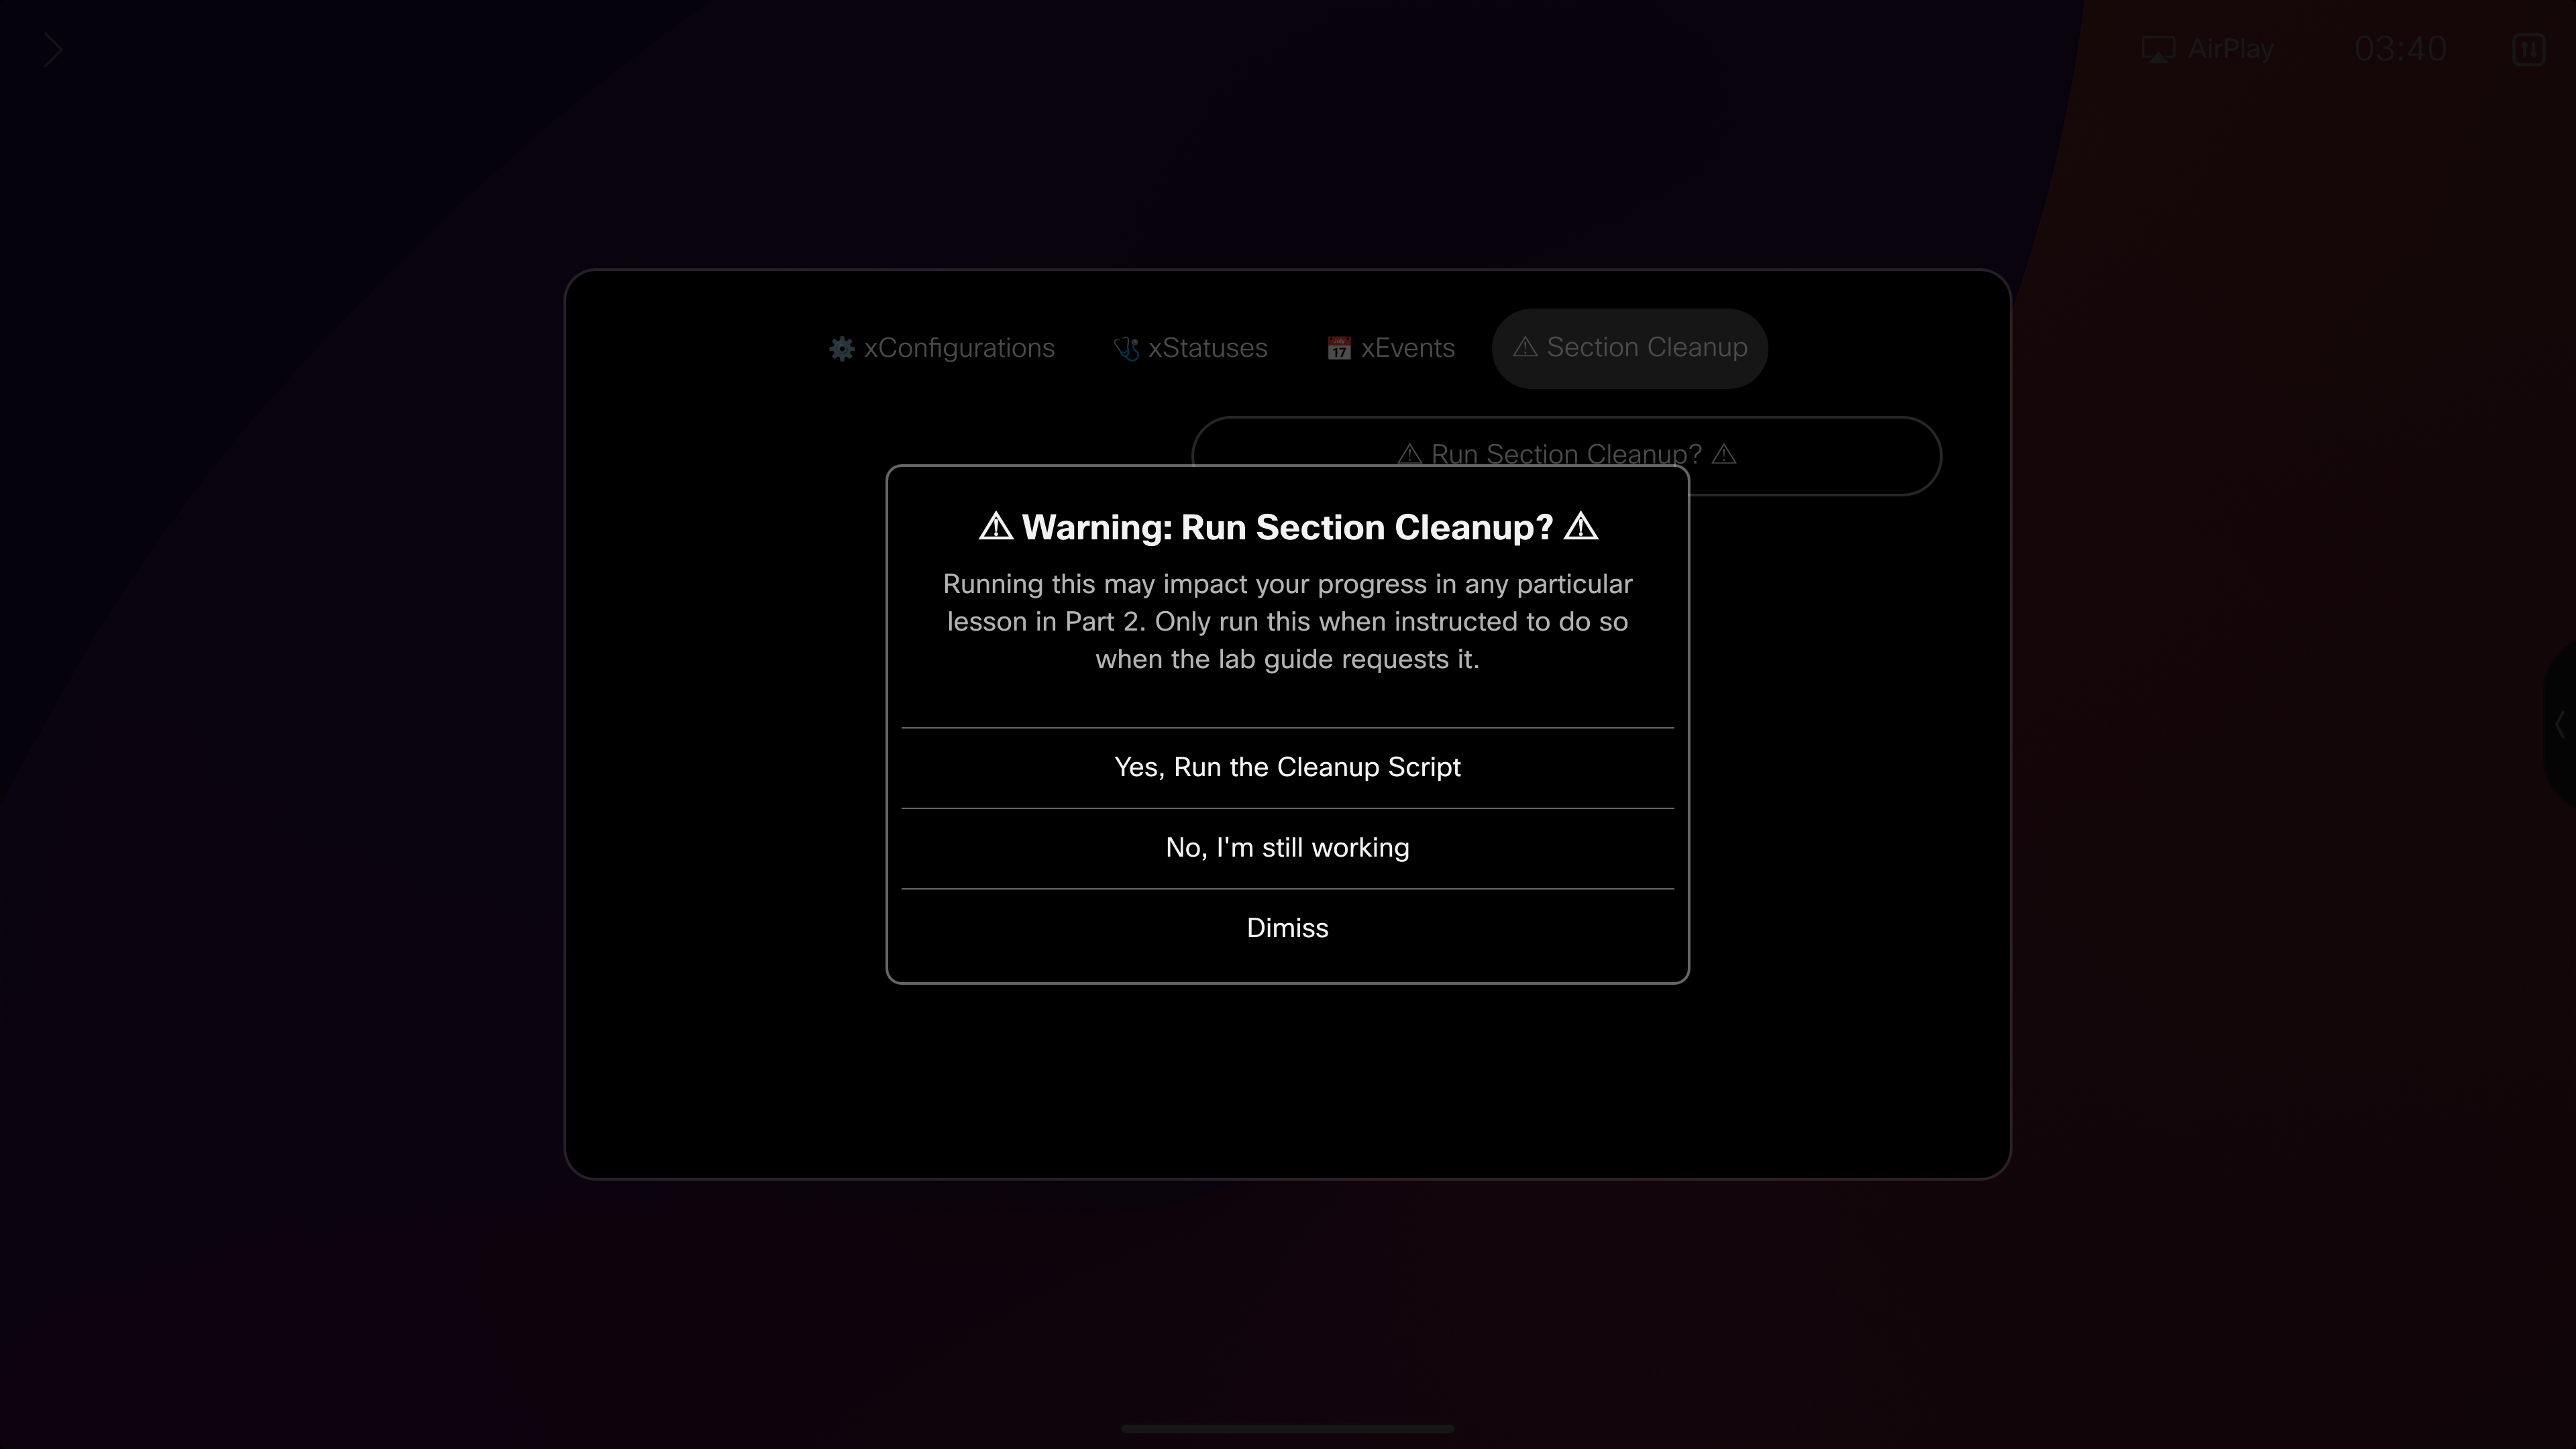
This will reverse the changes we've made to the endpoint, and leave us ready for the next section
You can run the cleanup via the terminal as well
Copy the contents below into your terminal window and run them all at once
xFeedback DeregisterAll
xConfiguration Audio DefaultVolume: 50
xCommand UserInterface Extensions Panel Remove PanelId: wx1_lab_multilineCommand
xCommand Video SelfView Set Mode: Off FullscreenMode: Off
xCommand Video Input SetMainVideoSource ConnectorId: 1
xCommand Audio Volume SetToDefault Device: Internal
Feel free to close your Terminal Window