Access RoomOS xAPI via SSH (section rxp-1)
Abstract
In this section, we'll dive into the various pieces of the RoomOS Device xAPI stack and how to make use of them in various ways over a Secure Shell (SSH) Session to a Cisco RoomOS Device.
Understanding how to navigate a terminal session with the a Cisco RoomOS Device will be instrumental in your device management and customization journey, but it's also a key integration pillar for many services on the market, such as a room control processors (Crestron, Extron, Etc) and
Section rxp-1 Requirements
Note
This lab assumes you have access to a Cisco RoomOS Device that is already setup and ready for use. If your device is not registered and online, please do so before beginning
Hardware
- A Laptop
- A Cisco Desk, Board or Room Series Device running the most recent On Premise or Cloud Stable software
- A Touch Controller is required when working on a Room Series Device. Either Room navigator or 3rd part touch display
- Preferred Device: Cisco Desk Pro
- A minimum of 1 camera (Either Integrated or External)
Software
- Laptop
- RoomOS Device
- Either the current On Premise or Cloud Stable release
Network
- Local Access to the RoomOS Device over port 22
- General access to the Internet
Establish SSH Connection to Device (rxp-1.1)
- Open the Terminal application on your device
- Connect to the Device via SSH using the built in OpenSSH platform in your terminal window
Note
Replace [USERNAME] with your Codec's Username and [IP_ADDRESS] with your Codec's IPv4 address that you set in section[X.X.X]
Type into terminal and press Enter
ssh [ROOMOS_USERNAME] [ROOMOS_IP_ADDRESS] If you encountered an warning running the command above, click here
If you encounter the following warning
ssh [USERNAME]@[IP_ADDRESS]
@@@@@@@@@@@@@@@@@@@@@@@@@@@@@@@@@@@@@@@@@@@@@@@@@@@@@@@@@@@
@    WARNING: REMOTE HOST IDENTIFICATION HAS CHANGED!     @
@@@@@@@@@@@@@@@@@@@@@@@@@@@@@@@@@@@@@@@@@@@@@@@@@@@@@@@@@@@
IT IS POSSIBLE THAT SOMEONE IS DOING SOMETHING NASTY!
Someone could be eavesdropping on you right now (man-in-the-middle attack)!
It is also possible that a host key has just been changed.
The fingerprint for the RSA key sent by the remote host is
SHA256:############################################
Please contact your system administrator.
Add correct host key in [PATH]/.ssh/known_hosts to get rid of this message.
Offending RSA key in [PATH]/.ssh/known_hosts:##
Host key for [IP_ADDRESS] has changed and you have requested strict checking.
Host key verification failed.
Double Check your device information and try again, if the information you entered is correct, try the following
Then run the following command to clear an old SSH Sha Key
Be sure to replace [IP_ADDRESS] with your Codec's IPv4
ssh-keygen -R [IP_Address]
- The OpenSSH platform will ask for you to confirm the device before connecting
- Type
yeswhen prompted into the terminal, then hit enter - Type the
[USERNAME]account password into the terminal when prompted, then hit enter
- Type
Successfully connecting to the Codec should prompt the following information and is now awaiting your input
Welcome to
Cisco Codec Release RoomOS [Codec_Software_Version]
SW Release Date: [Codec_Software_ReleaseDate]
*r Login successful
OK
Navigating the Terminal (rxp-1.2)
Abstract
In a terminal session with a Cisco Codec, you can execute commands, get, set or subscribe to configs, get or subscribe to status information as well as subscribe to events.
These are especially useful when developing a customization or troubleshooting a system.
Click to expand each lesson below, execute the contents as directed in your terminal session and observe the responses in the terminal window.
Lesson: Lists All User Command Nodes (rxp-1.2.1)
?
Compare your Terminal Output
- User Commands -
help            xcommand        xconfiguration  xdocument       xevent
xfeedback       xgetxml         xpreferences    xstatus         xtransaction
bye             echo            log             systemtools
OK
We won't cover every shell command above, we'll only focus on
For more information on the rest of those paths, check out the Offical xAPI Guide.Page 33 defines all nodes
Lesson: Lists Terminal Preference Option (rxp-1.2.2)
- Lists Terminal Preference Options
- The xPreferences command is used to set preferences for the RS-232 and SSH sessions.
xpref ?
Compare your Terminal Output
xpreferences usage:
  xpreferences outputmode <terminal/xml/json>
OK
Setting xpreferences outputmode to JSON will change the terminal response output into a JSON format and likewise with XML
Why might you consider JSON or XML?
- Your customization environment may be able to handle responses from the xAPI more efficiently if it's in an output format that easier for your environment to ingest
- For testing, we'd recommend the terminal format, but when interfacing via a Room Control Processor or another service, you may have tools available to you to parse either JSON or XML to optimize you solution
Click Here to review different Output Mode responses
xpref outputmode terminal

OK
xStatus Audio Volume
*s Audio Volume: 50
** end

OK
xpref outputmode xml
xStatus Audio Volume
<XmlDoc resultId="">
<Status>
  <Audio>
    <Volume>50</Volume>
  </Audio>
</Status>
</XmlDoc>
xpref outputmode json
xStatus Audio Volume
{
  "Status": {
    "Audio": {
      "Volume": {
        "Value": "50"
      }
    }
  }
}
Lesson: List Device Command Node References (rxp-1.2.3)
xCommand ?
Click to Compare your Terminal Output
- User Commands -

AirPlay          HttpClient       Provisioning     UserInterface
Audio            HttpFeedback     Proximity        UserManagement
Bookings         Logging          RemoteAccess     UserPresence
Call             Macros           RoomCleanup      Video
CallHistory      Message          RoomPreset       WebEngine
Camera           MicrosoftTeams   Security         Webex
Cameras          Network          SerialPort       WebRTC
Conference       Peripherals      Standby          Whiteboard
Diagnostics      Phonebook        SystemUnit       Zoom
Dial             Presentation     Time

OK
Lesson: List Device Status Node References (rxp-1.2.4)
xStatus ?
Click to Compare your Terminal Output
- Status -

Audio             ICE               Proximity         Time
Bookings          Logging           RemoteAccess      UserInterface
Call              MediaChannels     RoomAnalytics     Video
Cameras           MicrosoftTeams    RoomPreset        WebEngine
Capabilities      Network           SIP               Webex
Conference        NetworkServices   Standby           WebRTC
Diagnostics       Peripherals       SystemUnit
HttpFeedback      Provisioning      ThousandEyes

OK
Lesson: List Device Config Node References (rxp-1.2.5)
xConfiguration ?
Info
- User Configurations -

Apps              Logging           RoomAnalytics     ThousandEyes
Audio             Macros            RoomCleanup       Time
Bookings          MicrosoftTeams    RoomScheduler     UserInterface
CallHistory       Network           RTP               UserManagement
Cameras           NetworkServices   Security          Video
Conference        Peripherals       Sensors           VoiceControl
FacilityService   Phonebook         SerialPort        WebEngine
Files             Provisioning      SIP               Webex
HttpClient        Proximity         Standby           WebRTC
HttpFeedback      RemoteAccess      SystemUnit        Zoom

OK
Lesson: List Device Event Node References (rxp-1.2.6)
xEvent ?
Click to Compare your Terminal Output
xEvent ?
** end

OK
 The output of
 xEvent ? was not what you expected?
Try Removing the ? from xEvent and re-run the command
xEvent
Compare your Terminal Output
xEvent
*es Event Audio Input Connectors Ethernet SubId LoudspeakerActivity
*es Event Audio Input Connectors Ethernet SubId NoiseLevel
*es Event Audio Input Connectors Ethernet SubId PPMeter
*es Event Audio Input Connectors Ethernet SubId VuMeter
*es Event Audio Input Connectors HDMI Left PPMeter
*es Event Audio Input Connectors HDMI Left VuMeter
*es Event Audio Input Connectors HDMI Right PPMeter
*es Event Audio Input Connectors HDMI Right VuMeter
*es Event Audio Input Connectors Line PPMeter
*es Event Audio Input Connectors Line VuMeter
[... And the list goes on]
OK
All parent branches of the xAPI (TC, CE, and now RoomOS) have been in production for many years. The xEvent branch serves as a reminder that, as developers, we sometimes make decisions early on that have lasting effects. While there are differences in this branch that were introduced during earlier development, we have chosen to preserve them to ensure backwards compatibility with existing integrations. This approach helps avoid major disruptive changes for our community and supports solutions that are still in use today 
Lesson: Search for an xAPI using a Wildcard // (rxp-1.2.7)
xConfiguration // Name ?
Click to Compare your Terminal Output
Note
You can also place a wildcard in multiple places within a path
xConfiguration // Video // Name ?
xConfiguration // Name ?
*? xConfiguration FacilityService Service[1] Name: <S: 0, 1024>
*? xConfiguration FacilityService Service[2] Name: <S: 0, 1024>
*? xConfiguration FacilityService Service[3] Name: <S: 0, 1024>
*? xConfiguration FacilityService Service[4] Name: <S: 0, 1024>
*? xConfiguration FacilityService Service[5] Name: <S: 0, 1024>
*? xConfiguration Network[1] DNS Domain Name: <S: 0, 64>
*? xConfiguration SystemUnit Name: <S: 0, 50>
*? xConfiguration UserInterface NameAndSiteLabels Mode: <Auto, Hidden>
*? xConfiguration UserInterface Theme Name: <Auto, Light, Night>
*? xConfiguration Video Input Connector[1] Name: <S: 0, 50>
*? xConfiguration Video Input Connector[2] Name: <S: 0, 50>
*? xConfiguration Video Input Connector[3] Name: <S: 0, 50>
*? xConfiguration Video Input Connector[4] Name: <S: 0, 50>

OK
Executing Commands (rxp-1.3)
xCommands
Commands instruct the device to execute actions, such as to dial a number or to search the phone book. All commands start with the prefix xCommand followed by a command path
Click to expand each xCommand Lesson below, execute each Task in your terminal session as instructed and observe the responses in your terminal window as well as observe what happens to your Cisco RoomOS Device after each command is run
Lesson: Execute an xCommand (rxp-1.3.1)
-
xAPI: xCommand Video SelfView Set
-
Task:
Type into terminal and press EnterxCommand Video SelfView Set Mode: On FullscreenMode: On OnMonitorRole: First-
Observe the change to your Codec's Display, you should see your camera's SelfView Video in Full Screen on the OSD of your device.
- If your video is blank, make sure your device's camera cover(if available) is not closed
Type into terminal and press EnterxCommand Video SelfView Set Mode: On FullscreenMode: Off- Observe the change to your Codec's Display, you should see your camera feed in a Picture in Picture(PIP) Window
Type into terminal and press EnterxCommand Video SelfView Set Mode: Off- Now your camera video should be closed
-
Additional Info
Notice when we set the Mode parameter to
These are what's known as
As you explore the API, feel free to click on the
Lesson: Execute an xCommand with multiple arguments with the same name (rxp-1.3.2)
-
xAPI(s):
- xCommand Video SelfView Set
- xCommand Video Input SetMainVideoSource
-
Task:
Type into terminal and press EnterxCommand Video SelfView Set Mode: On FullscreenMode: OnType into terminal and press EnterxCommand Video Input SetMainVideoSource ConnectorId: 1 ConnectorId: 1- Observe the change to your Codec's Display, you should see 2 instances of your camera feed spread equally in FullScreen
Additional Info
-
xCommand Video Input SetMainVideoSource, and other xAPIs like it offer some parameters that allow you to enter them in multiple times. Notice how we used
ConnectorId: 1 twice. This will create a 2x1 composition of your first video input connector and set this as your MainSource by default. This will effect SelfView and what you output on the far end of the Video Call. -
Even though it's
NOT practical to send a duplicate camera source into a call as we are now, it allows us a chance to interact with this xAPI and understand how it operates. This xAPI in particular was built to handle multiple video source inputs. For instance, if you had a Room Kit EQ with 4 cameras connected, you can compose all 4 cameras as apart of your MainSource, giving you an opportunity to visually communicate to the Far End in new ways
View Successful OSD Output
 Type into terminal and press Enter
xCommand Video Input SetMainVideoSource ConnectorId: 1 ConnectorId: 1 Layout: PIP- Observe the change to your Codec's Display, you should see 2 instances of your camera feed, 1 FullScreen and another in a PIP window
Additional Info
xCommand Video Input SetMainVideoSource has more than one parameter we can use to alter the composition in our MainSource. By default, the
Layout parameter is set to a value ofEqual , but we could opt forPIP orProminent asLayout values as well.View Successful OSD Output
Successful execution of this command, with
PIP set as theLayout , will look similar to image below
- Lets wrap this lesson up by setting your MainSource back to a single connector and disabling SelfView
Type into terminal and press EnterxCommand Video Input SetMainVideoSource ConnectorId: 1 xCommand Video SelfView Set Mode: Off- Observe the change to your Codec's Display, your SelfView should be gone now
Lesson: Execute an xCommand with a multiline argument (rxp-1.3.3)
Info
Some commands require a larger body of data. This data is written as a large string; some written in a variety of formats and this format is outlined by the individual xAPI's documentation
When working in a terminal window, multiline commands are formatted as follows:
[Command Path]          # Your xCommand Path to run
[Multi Line Content]    # Your Multi Line content (Body)
.                       # Terminate your Multi Line content with a dot .
xCommand Macros Macro Save Name: Test   # Your xCommand Path to run
import xapi from 'xapi';                # Your Multi Line content (Body)

console.log('Hello World');
.                                       # Terminate your Multi Line content with a dot .
Note
The command should be terminated with a dot
-
xAPI: xCommand UserInterface Extensions Panel Save
-
Task:
Type into terminal and press EnterxCommand UserInterface Extensions Panel Save PanelId: wx1_lab_multilineCommand <Extensions><Panel><Order>1</Order><PanelId>wx1_lab_multilineCommand</PanelId><Location>HomeScreen</Location><Icon>Info</Icon><Color>#1170CF</Color><Name>MultiLine Command [Section (rxp-1.3)]</Name><ActivityType>Custom</ActivityType></Panel></Extensions> . -
Observe the change to your Codec's Display, you should see a new Panel Button labeled
MultiLine Command [Section (rxp-1.3)]on your Touch Control interface
View Successful OSD output

Lesson: Execute an xCommand which generates data and responds (rxp-1.3.4)
Info
Some commands will generate data and output a response of that data. All commands will respond with either "OK" or "Error" but other commands can provide additional information.
-
xAPI: xCommand Extensions List
-
Task:
Type into terminal and press EnterxCommand UserInterface Extensions List ActivityType: Custom -
Observe your Terminal Window's output, you should see details of both the
MultiLine Command [Section (rxp-1.3)]panel you loaded in previously as well as theSubscription Assistantpanel details
Click to Compare your Terminal Output
OK
*r ExtensionsListResult (status=OK):
*r ExtensionsListResult Extensions Version: "1.11"
*r ExtensionsListResult Extensions Panel 1 Icon: Custom
*r ExtensionsListResult Extensions Panel 1 Location: HomeScreenAndCallControls
*r ExtensionsListResult Extensions Panel 1 ActivityType: Custom
*r ExtensionsListResult Extensions Panel 1 Name: "Subscription Assistant [Lab 1451]"
*r ExtensionsListResult Extensions Panel 1 PanelId: "wx1_1451_pt2_labBuddy"
*r ExtensionsListResult Extensions Panel 1 Origin: local
*r ExtensionsListResult Extensions Panel 1 Order: 99
[...]
*r ExtensionsListResult Extensions Panel 2 Icon: Info
*r ExtensionsListResult Extensions Panel 2 Location: HomeScreen
*r ExtensionsListResult Extensions Panel 2 ActivityType: Custom
*r ExtensionsListResult Extensions Panel 2 Name: "MultiLine Command [Section (rxp-1.3)]"
*r ExtensionsListResult Extensions Panel 2 PanelId: "wx1_lab_multilineCommand"
*r ExtensionsListResult Extensions Panel 2 Origin: local
*r ExtensionsListResult Extensions Panel 2 Order: 1
*r ExtensionsListResult Extensions Panel 2 Color: "#1170CF"
*r ExtensionsListResult Extensions Panel 2 Visibility: Auto
Getting, Setting and Subscribing to xConfigurations (rxp-1.4)
xConfigurations
Configurations are device settings that are persistent across device boots. Like commands, configurations are also structured in a hierarchy
Click to expand each xConfiguration Lesson below, execute them in your terminal session and observe the responses in the terminal window
Lesson: Getting an xConfiguration Value (rxp-1.4.1)
-
xAPI: xConfiguration Audio DefaultVolume
-
Task:
Type into terminal and press EnterxConfiguration Audio DefaultVolume- Observe your Terminal Window's output, you should see the value for your Audio DefaultVolume
Compare your Terminal Output
*c xConfiguration Audio DefaultVolume: 50
** end

OK
Lesson: Set a new xConfiguration Value (rxp-1.4.2)
-
xAPI: xConfiguration Audio DefaultVolume
-
Task:
Type into terminal and press EnterxConfiguration Audio DefaultVolume: 75- Observe your terminal output and review the response
Click to Compare your Terminal Output
** end OK- Now that we've set the default volume to 75, let's double check our work by getting that value one more time
Type into terminal and press EnterxConfiguration Audio DefaultVolumeClick to Compare your Terminal Output
*c xConfiguration Audio DefaultVolume: 75
** end

OK
Note
The
Click on the tabs below to see the differences side by side
xConfiguration Audio DefaultVolume
xConfiguration Audio DefaultVolume
Do xConfigurations offer Multiple Parameters or have Multiline execution?
No, that's solely related to commands. When setting an xConfiguration, they only ever contain 1 value and though some of those values can be quite long as a string, the syntax to enter them into the console is all written in the same line of the terminal shell
Lesson: Get multiple xConfiguration Values under a Common Node (rxp-1.4.3)
Info
In many cases, you may want to pull information in bulk. We can do this easily by moving running an xConfiguration get request on Higher Common Node in the xAPI path
What do we mean by Higher Common Node
Click on the tabs below, to see how we'll change our requests by accessing a Higher Common Node on each level of an xAPI Path
xConfiguration Bluetooth Allowed
xConfiguration Bluetooth Allowed
xConfiguration Bluetooth Allowed
Note
This Diagram only show a very small subset of our xAPI. We have hundreds of xAPI to explore
flowchart TD
  xAPI --> |Highest Common Node| A
  A[xConfiguration] -->|Next Node| B(Audio)
  B --> bb(Default Volume)
  B --> bc(Input)
  B --> ba(...)
  bc --> bd(...)
  A --> |Next Node| C(Network)
  C --> CC(IPv4)
  CC --> CCC(Address)
  CC --> CCD(Gateway)
  CC --> CCE(...)
  A --> |Next Node| D(UserInterface)
  D --> DD(Message)
  D --> DF(Extensions)
  D --> DG(...)
  DD --> DDE(...)
  DF --> DDF(...)
  C --> CD(...)
  A --> |Next Node| E(Video)
  E --> EE(Input)
  EE --> EEE(...)
  E --> EF(Output)
  EF --> EEF(...)
  E --> EG(...)
A --> |Nodes Continued| F(...)-
xAPI: xConfiguration Audio
-
Task:
Type into terminal and press EnterxConfiguration Audio- Observe your terminal output and review the response
Click to Compare your Terminal Output
*c xConfiguration Audio Input Value: 75
*c xConfiguration Audio Input HDMI 1 Level: -5
*c xConfiguration Audio Input HDMI 1 Mode: On
*c xConfiguration Audio Input HDMI 1 VideoAssociation MuteOnInactiveVideo: On
*c xConfiguration Audio Input Microphone 1 Mode: On
*c xConfiguration Audio Input MicrophoneMode: Focused
*c xConfiguration Audio Input USBC 1 Level: -5
*c xConfiguration Audio Input USBC 1 Mode: On
*c xConfiguration Audio Input USBC 1 VideoAssociation MuteOnInactiveVideo: On
*c xConfiguration Audio Input USBMicrophone 1 EchoControl Mode: On
*c xConfiguration Audio Input USBMicrophone 1 Level: 5
*c xConfiguration Audio Input USBMicrophone 1 Zone: 1
*c xConfiguration Audio Microphones Mute Enabled: True
*c xConfiguration Audio Microphones NoiseRemoval Mode: Enabled
*c xConfiguration Audio Microphones UsbPassthrough MuteButton: Inactive
*c xConfiguration Audio Microphones VoiceActivityDetector Mode: Off
*c xConfiguration Audio Output InternalSpeaker Mode: On
*c xConfiguration Audio Panning HeadsetAnalog BinauralProcessing: True
*c xConfiguration Audio Panning HeadsetAnalog Mode: Auto
*c xConfiguration Audio Panning HeadsetUSB BinauralProcessing: False
*c xConfiguration Audio Panning HeadsetUSB Mode: Auto
*c xConfiguration Audio Panning Mode: Auto
*c xConfiguration Audio SoundsAndAlerts RingTone: "Sunrise"
*c xConfiguration Audio SoundsAndAlerts RingVolume: 0
*c xConfiguration Audio USB Mode: SpeakerAndMicrophone
*c xConfiguration Audio USB VolumeControl Capture Mode: Bypass
*c xConfiguration Audio USB VolumeControl Capture Value: 0
*c xConfiguration Audio USB VolumeControl Playback Mode: Bypass
*c xConfiguration Audio USB VolumeControl Playback Value: 0
*c xConfiguration Audio Ultrasound MaxVolume: 70
** end
By simply removing DefaultVolume
Lesson: Subscribing to an xConfiguration (rxp-1.4.4)
What do we mean by Subscribe?
A
-
This lets you automatically watch for changes as they happen, and react to them—for example, to automate a process—without needing to keep checking the value yourself.
-
When you start a subscription, you won’t see any results right away. You’ll only see something printed to the console after a change happens in that xAPI branch.
-
If you need to know the current value as soon as your script starts, you should perform a Get request against the same branch to retrieve it, then subscribe to monitor for any future changes.
-
xAPI: xConfiguration Audio DefaultVolume
-
Task:
Type into terminal and press EnterxFeedback Register Configuration/Audio/DefaultVolume- Press the
Subscription Assistant Button on your Touch Interface- Under the xConfigurations Page, move the Slider labeled
Audio DefaultVolume to a new position and release - Observe your
Terminal Window's output, you should see events for your Subscription fill theTerminal Window as that value changesOptional : Move the slider a few more times to see more changes come in
- Under the xConfigurations Page, move the Slider labeled
Click to Compare your Terminal Output

View Subscription Assistant Operation
- Press the
Lesson: Unsubscribing from an xConfiguration (rxp-1.4.5)
Just as we can subscribe to information, we can unsubscribe from that same information
Why bother with Unsubscribing?
Today, we have a limit of 50 unique subscriptions (or feedback registrations) that can be enabled on a device at any given time.
Documented on page 40 of the Official xAPI Guide
So as your solutions grow, managing your subscriptions can become increasingly more important.
-
xAPI: xConfiguration Audio DefaultVolume
-
Task:
Type into terminal and press EnterxFeedback Deregister Configuration/Audio/DefaultVolume- Press the
Subscription Assistant Button on your Touch Interface- Under the xConfigurations Page, move the Slider labeled Audio DefaultVolume to a new position and release
- Observe your
Terminal Window's output, those responses you saw in the previous lesson should have stopped outputting in yourTerminal Window Optional : Move the slider a few more times to verify
- Press the
Lesson: Subscribe to Multiple xConfigurations under a Common Node (rxp-1.4.6)
Info
Just as we can Get multiple xConfiguration values, we can also subscribe to multiple xConfiguration values under a Higher Common Node
Subscribing to a Higher Common Node doesn't consume multiple subscriptions, in fact it only consumes 1 of the 50 alloted to you. This can allow you to subscribe to a larger dataset while consuming less subscriptions in your automation.
Click on the tabs below, to see how we'll change our requests by accessing a Higher Common Node on each level of an xAPI Path
xFeedback Register
xFeedback Register /Allowed
xFeedback Register /Bluetooth/Allowed
-
xAPI: xConfiguration Video Input Airplay
-
Task:
Type into terminal and press EnterxFeedback Register Configuration/Video/Input/AirPlay- Press the
Subscription Assistant Button on your Touch Interface- Under the xConfigurations Page, press the toggles and buttons in the
Airplay row - Observe your
Terminal Window's output, you should see events for your Subscription fill theTerminal Window Optional : Press those buttons and switches a few times to see more changes come in
- Under the xConfigurations Page, press the toggles and buttons in the
Click to Compare your Terminal Output

View Subscription Assistant Operation
- Press the
Lesson: Unsubscribe to Multiple xConfigurations under a Higher Common Node (rxp-1.4.7)
-
xAPI: xConfiguration Video Input Airplay
-
Task:
Type into terminal and press EnterxFeedback Deregister Configuration/Video/Input/AirPlay- Press the
Subscription Assistant Button on your Touch Interface- Under the xConfigurations Page, press the toggles and buttons in the
Airplay row - Observe your
Terminal Window's output, those responses you saw in the previous lesson should have stopped outputting in yourTerminal Window Optional : Press those buttons and switches a few times to see more changes come in
- Under the xConfigurations Page, press the toggles and buttons in the
- Press the
Tip
In cases where you have multiple subscriptions, you can unsubscribe from all by running
xFeedback DeregisterAll
Getting and Subscribing to Status (rxp-1.5)
xStatuses
xStatuses contain information about the current state of the device, such as connected calls, the status of the gatekeeper registration, connected inputs and output sources. This status information will fire a callback when that particular status occurs and their last known state is stored and can be retrieved.
Many of the same techniques we reviewed under section Getting, Setting and Subscribing to xConfigurations (rxp-1.4) will apply to xStatuses
Be sure to complete Getting, Setting and Subscribing to xConfigurations (rxp-1.4) prior to continuing in this section, as many pieces of additional context were covered there, and won't be repeated moving forward
Click to expand each xStatus Lesson below, execute them in your terminal session and observe the responses in the terminal window
Lesson: Getting an xStatus Value (rxp-1.5.1)
-
xAPI: xStatus Audio Volume
-
Task:
Type into terminal and press EnterxStatus Audio Volume- Observe your terminal output and review the response
Click to Compare your Terminal Output
*s Audio Volume: 65
** end
Lesson: Get multiple xStatus Values under a Common Node (rxp-1.5.2)
-
xAPI: xStatus Audio Input
-
Task:
Type into terminal and press EnterxStatus Audio Input- Observe your terminal output and review the response
Click to Compare your Terminal Output
[PLACEHOLDER - LUIS OUTPUT]
Lesson: Subscribing to an xStatus (rxp-1.5.3)
-
xAPI: xStatus Audio Volume
-
Task:
Type into terminal and press EnterxFeedback Register Status/Audio/Volume- Press the
Subscription Assistant Button on your Touch Interface- Under the xStatuses Page, move the Slider labeled
Adjust Volume to a new position and release- Alternatively, you can adjust the volume with the Codec's native volume control buttons
- Observe your
Terminal Window's output, you should see events for your Subscription fill theTerminal Window Optional : Move the slider a few more times to see more changes come in
- Under the xStatuses Page, move the Slider labeled
Click to Compare your Terminal Output

View Subscription Assistant Operation
- Press the
Lesson: Unsubscribing to an xStatus (rxp-1.5.4)
-
xAPI: xStatus Audio Input
-
Task:
Type into terminal and press EnterxFeedback Deregister Status/Audio/Volume- Press the
Subscription Assistant Button on your Touch Interface- Under the xStatuses Page, move the Slider labeled
Adjust Volume to a new position and release- Alternatively, you can adjust the volume with the Codec's native volume control buttons
- Observe your
Terminal Window's output, those responses you saw in the previous lesson should have stopped outputting in yourTerminal Window Optional : Move the slider a few more times to see more changes come in
- Under the xStatuses Page, move the Slider labeled
- Press the
Lesson: Subscribe to Multiple xStatuses under a Common Node (rxp-1.5.5)
-
xAPI: xStatus Cameras Camera[n] Position
-
Task:
Type into terminal and press EnterxFeedback Register Status/Cameras/Camera/PositionWhat happened to the
[n] in the xAPI Path?You may have noticed we never declared
[n] in the xAPI Path for the command we ran. This was left out on purpose.[n] corresponds to theCameraId you want to target. Some Codecs can control up 7 cameras, so these xAPI paths branch per connected CameraWhereas you could be running this lab on a variety of RoomOS Devices, it's better to leave [n] out of the path for Lab Purposes. Not declaring [n] adds new value to us as developers in a multi-camera system; it allows us to subscribe to ALL camera's positions as they change rather than having to specify 1 camera of interest
- Press the
Subscription Assistant Button on your Touch Interface- Under the xStatuses Page, click the button in the
Camera Control Wheel row- Alternatively, you can adjust your cameras position through the native camera control interface
- Observe your
Terminal Window's output, you should see events for your Subscription fill theTerminal Window Optional : Continue pressing buttons to see more changes come in
- Under the xStatuses Page, click the button in the
Click on the tabs below to
![xStatus Cameras Camera[n] Position Output Gif](../images/2-2-4_xStatus-Subscribe-CameraPosition.gif)

- Press the
Lesson: Unsubscribe from all xStatuses (rxp-1.5.6)
-
xAPI: N/A
-
Task:
Type into terminal and press EnterxFeedback DeregisterAll- Press the
Subscription Assistant Button on your Touch Interface- Under the xStatuses Page, click the button in the
Camera Control Wheel row- Alternatively, you can adjust your cameras position through the native camera control interface
- Observe your
Terminal Window's output, those responses you saw in the previous lesson should have stopped outputting in yourTerminal Window Optional : Continue pressing buttons to see more changes come in
- Under the xStatuses Page, click the button in the
- Press the
Subscribing to Events (rxp-1.6)
xEvents
Similar to xStatuses, xEvents will fire a callback when that particular event occurs; however, xEvents contain simpler information that's not necessary to store on the device, so you will not be able to get the value of the event after it fires.
Why not store xEvent Data?
As noted above, xEvents are much simpler callbacks.
For example,
When compared to
Click to expand each xEvent Lesson below, execute them in your terminal session and observe the responses in the terminal window.
Lesson: Subscribing to an xEvent (rxp-1.6.1)
-
xAPI: xEvent UserInterface Message Prompt Response
-
Task:
Type into terminal and press EnterxFeedback Register Event/UserInterface/Message/Prompt/Response- Press the
Subscription Assistant Button on your Touch Interface- Under the xEvents Page, click the
Prompt Button in theUserInterface Message row- This will create a Pop Up with 5 options
- Click on any one of these 5 Options
- Observe your
Terminal Window's output, you should see events for your Subscription fill theTerminal Window Optional : Feel free to try each of the options under thatPromptand continue to observe yourTerminal Window's to understand how each one of them differs
- Now click either the
TextInput, theRatingor theAlertbutton and follow any instructions those interfaces offer - Observe your
Terminal Window's output, you should see events for your Subscription fill theTerminal Window - Responses for
TextInput,RatingorAlertshouldn't show since you're currently only subscribed to thePromptbranch
- Responses for
- Under the xEvents Page, click the
Click to Compare your Terminal Output

View Subscription Assistant Operation
- Press the
Lesson: Unsubscribing to an xEvent (rxp-1.6.2)
-
xAPI: xEvent UserInterface Message Prompt Response
-
Task:
Type into terminal and press EnterxFeedback Deregister Event/UserInterface/ScreenShotRequest/RequestId- Press the
Subscription Assistant Button on your Touch Interface- Under the xEvents Page, click either the
Prompt, theTextInput, theRatingor theAlertbutton in theUserInterface Message row and submit any accompanying actions in that interface - Observe your
Terminal Window's output, those responses you saw in the previous lesson should have stopped outputting in yourTerminal Window
- Under the xEvents Page, click either the
- Press the
Lesson: Subscribe to Multiple xEvents under a Common Node (rxp-1.6.3)
- xAPI: xEvent UserInterface
Note
By Subscribing to a Higher Common Node, such as xEvent UserInterface, we can see all UI related Events available in that xAPI Node
-
Task:
Type into terminal and press EnterxFeedback Register Event/UserInterface- Press the
Subscription Assistant Button on your Touch Interface- Under the xEvents Page, try any of the
Widgetson this page, and submit any accompanying actions in that interface if any - Observe your
Terminal Window's output, you should see events for your Subscription fill theTerminal Window Optional : Try all of theWidgetson that page
- Under the xEvents Page, try any of the
Click to Compare your Terminal Output

View Subscription Assistant Operation
- Press the
Lesson: Unsubscribe from all xEvents (rxp-1.6.4)
-
xAPI: N/A
-
Task:
Type into terminal and press EnterxFeedback DeregisterAll- Press the
Subscription Assistant Button on your Touch Interface- Under the xEvents Page, try any of the
Widgetson this page, and submit any accompanying actions in that interface if any - Observe your
Terminal Window's output, those responses you saw in the previous lesson should have stopped outputting in yourTerminal Window Optional : Continue pressing buttons to see more changes come in
- Under the xEvents Page, try any of the
- Press the
Tagging your xAPI Calls (rxp-1.7)
As you work to build your automation in a SSH terminal session, you may find yourself making multiple calls against the same path and the timing of that output may be critical for your solution.
To help simplify which data belongs where, you can tag your xAPI paths with a custom value to better track your work.
By appending myValue"
Review Tagging examples below
xStatus Audio Volume |resultId="Custom Value 1"
*s Audio Volume: 50
** resultId: "Custom Value 1"
** end
xCommand Video SelfView Set Mode: On |resultId="Custom Value 2"

OK
*r SelfViewSetResult (status=OK):
** resultId: "Custom Value 2"
** end
xConfiguration SystemUnit Name |resultId="Custom Value 3"
*c xConfiguration SystemUnit Name: " "
** resultId: "Custom Value 3"
** end

OK
Note
When declaring xFeedback, or subscribing to any xAPI, the resultId will only print when you execute the command, but will not print with the subsequent data coming in from the subscription
xFeedback Register Event/CallSuccessful |resultId="Custom Value 4"
** resultId: "Custom Value 4"
** end

OK
*e CallSuccessful Protocol: "Spark"
*e CallSuccessful Direction: "outgoing"
*e CallSuccessful RemoteURI: "spark:XXXXXXXX-XXXX-XXXX-XXXX-XXXXXXXXXXXX"
*e CallSuccessful EncryptionIn: "On"
*e CallSuccessful EncryptionOut: "On"
*e CallSuccessful CallRate: 20000
*e CallSuccessful CallId: 3
** end
*e CallSuccessful Protocol: "Spark"
*e CallSuccessful Direction: "outgoing"
*e CallSuccessful RemoteURI: "spark:XXXXXXXX-XXXX-XXXX-XXXX-XXXXXXXXXXXX"
*e CallSuccessful EncryptionIn: "On"
*e CallSuccessful EncryptionOut: "On"
*e CallSuccessful CallRate: 20000
*e CallSuccessful CallId: 4
** end
Section rxp-1 Cleanup (rxp-1.8)
Important
- Press the
Subscription Assistant Button on your Touch Interface - Under the
Section Cleanup Page, select theRun Section Cleanup? button - Select
Yes, Run the Cleanup Script
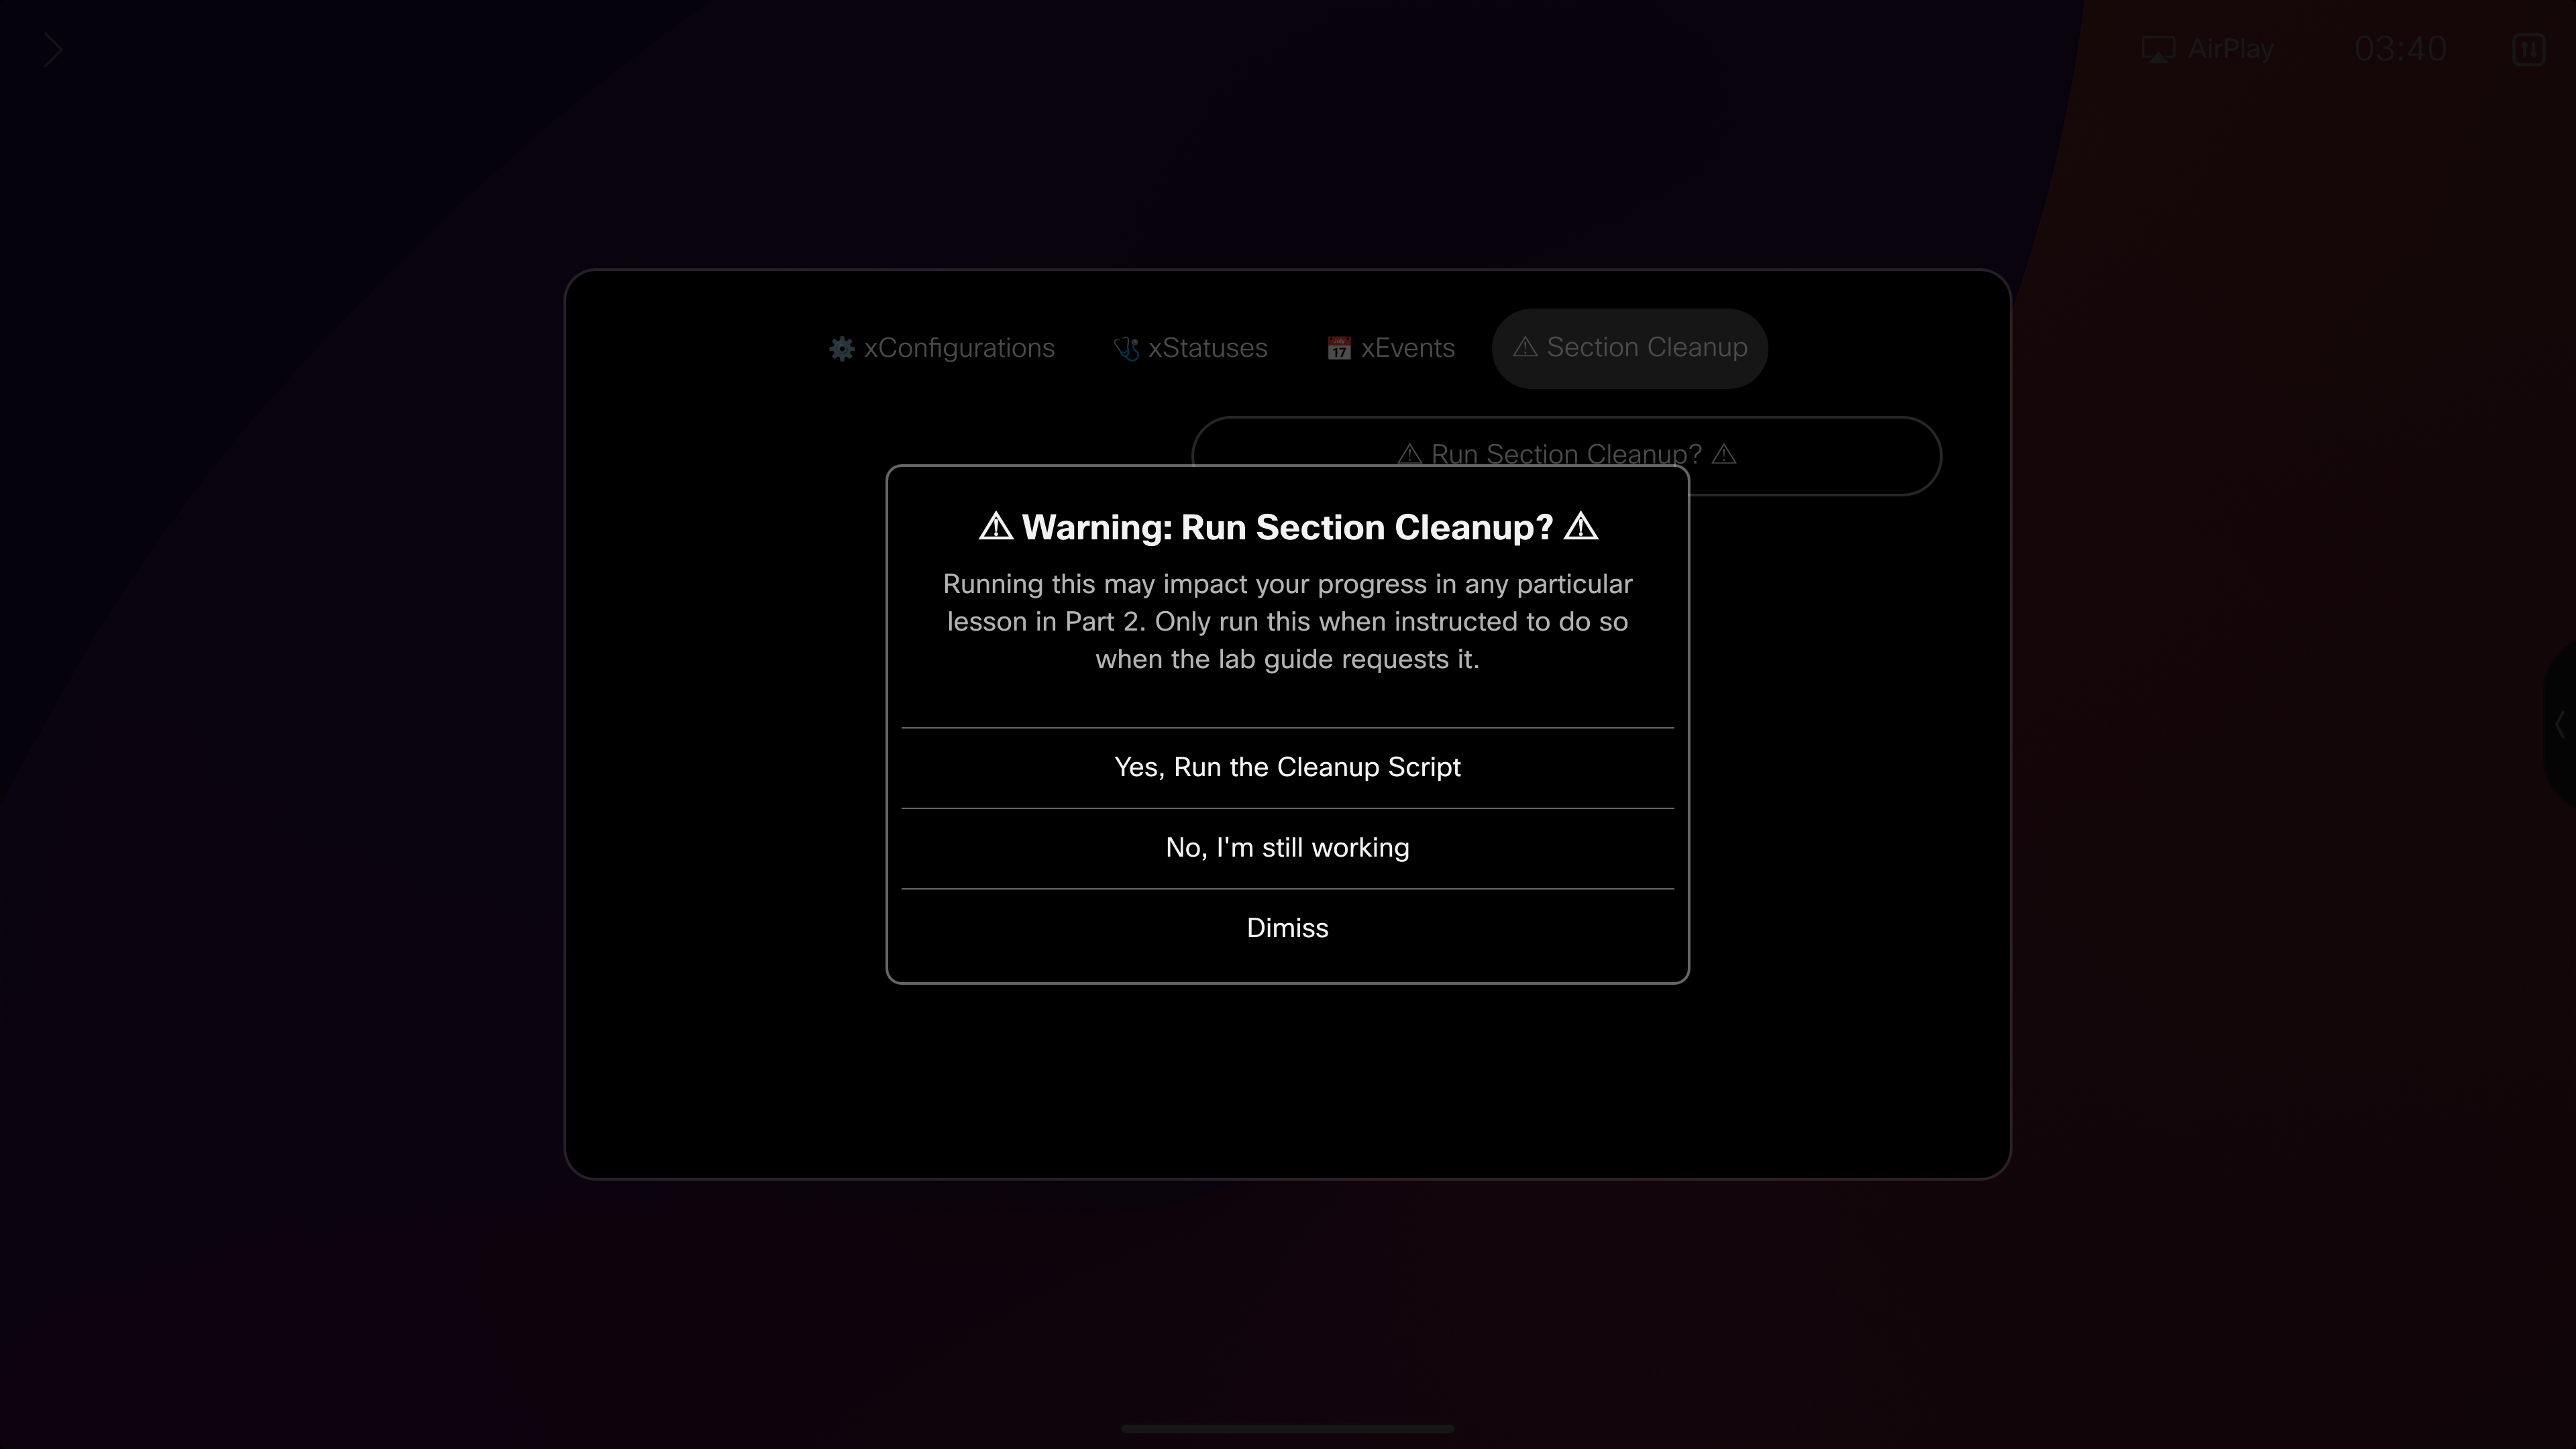
This will reverse the changes we've made to the endpoint, and leave us ready for the next section
You can run the cleanup via the terminal as well
Copy the contents below into your terminal window and run them all at once
xFeedback DeregisterAll
xConfiguration Audio DefaultVolume: 50
xCommand UserInterface Extensions Panel Remove PanelId: wx1_lab_multilineCommand
xCommand Video SelfView Set Mode: Off FullscreenMode: Off
xCommand Video Input SetMainVideoSource ConnectorId: 1
xCommand Audio Volume SetToDefault Device: Internal
Feel free to close your Terminal Window