Integrate Webex Contact Center with Salesforce Using the Legacy CRM Connector
Please use the following credentials to complete the tasks:
Control Hub |
https://admin.webex.com |
Salesforce |
https://login.salesforce.com/ |
Salesforce Developer Edition |
Sign up link: https://www.salesforce.com/products/free-trial/developer/ |
Task Objectives
- Define and configure the Call Center in Salesforce and add users.
- Create a softphone layout and set screen pop preferences.
- Add the Webex Contact Center softphone to the Salesforce Sales app.
- Test the Webex Contact Center softphone integration in Salesforce.
1. Create Salesforce Trial Account
- Navigate to Salesforce Developer portal: https://www.salesforce.com/products/free-trial/developer/ and log in and create an account
Note
Trial account only expires if its not logged in alteast once in 45 days.
2. Configure Legacy Connector
Attention
Please use the Firefox browser to access, configure, and test within the Salesforce portal.
-
Please use the "integrate" section of the guide for step by step installation https://help.webex.com/en-us/article/nhxw7kfb/Integrate-Webex-Contact-Center-with-Salesforce-(Version-1%E2%80%94Legacy)#Cisco_Task_in_List_GUI.dita_6e0e23f7-7df8-4a52-872a-af63dff16f5c/
-
Congratulations! You have complete the task.
3. (Optional step) Update the Salesforce Domain
To update the domain (to something that you can remember or differentiate) you can follow the below steps
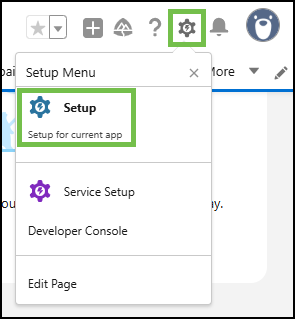
- In Salesforce, navigate to 'Setup' by clicking the gear icon in the top-right corner and selecting 'Setup'.
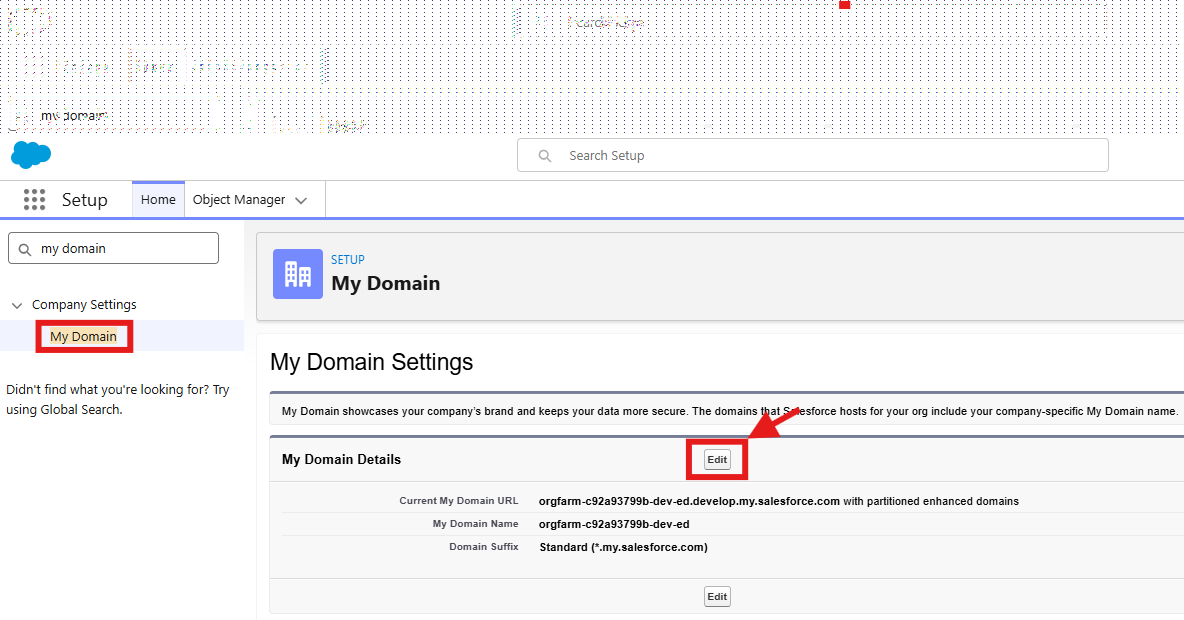
- Navigate to 'Compnay Settings > My Domain' (or type My Domain in the search bar above the left-hand menu) anbd hit Edit
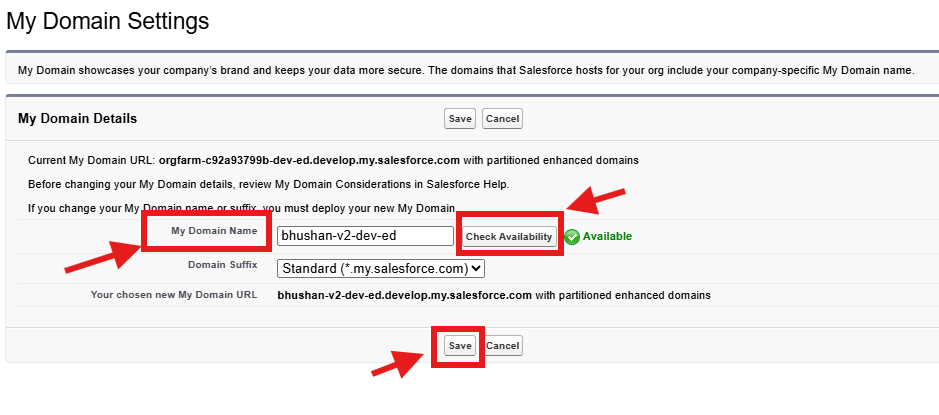
- Enter the My Domain Name, select Check Availability and Save
- Deploy the domain (this steps will take up to 15 mins minutes to complete but you receive an email once complete